The Deployments page is your central hub for managing all your Docker applications. Here you can create new deployments, monitor their status, and control their lifecycle.
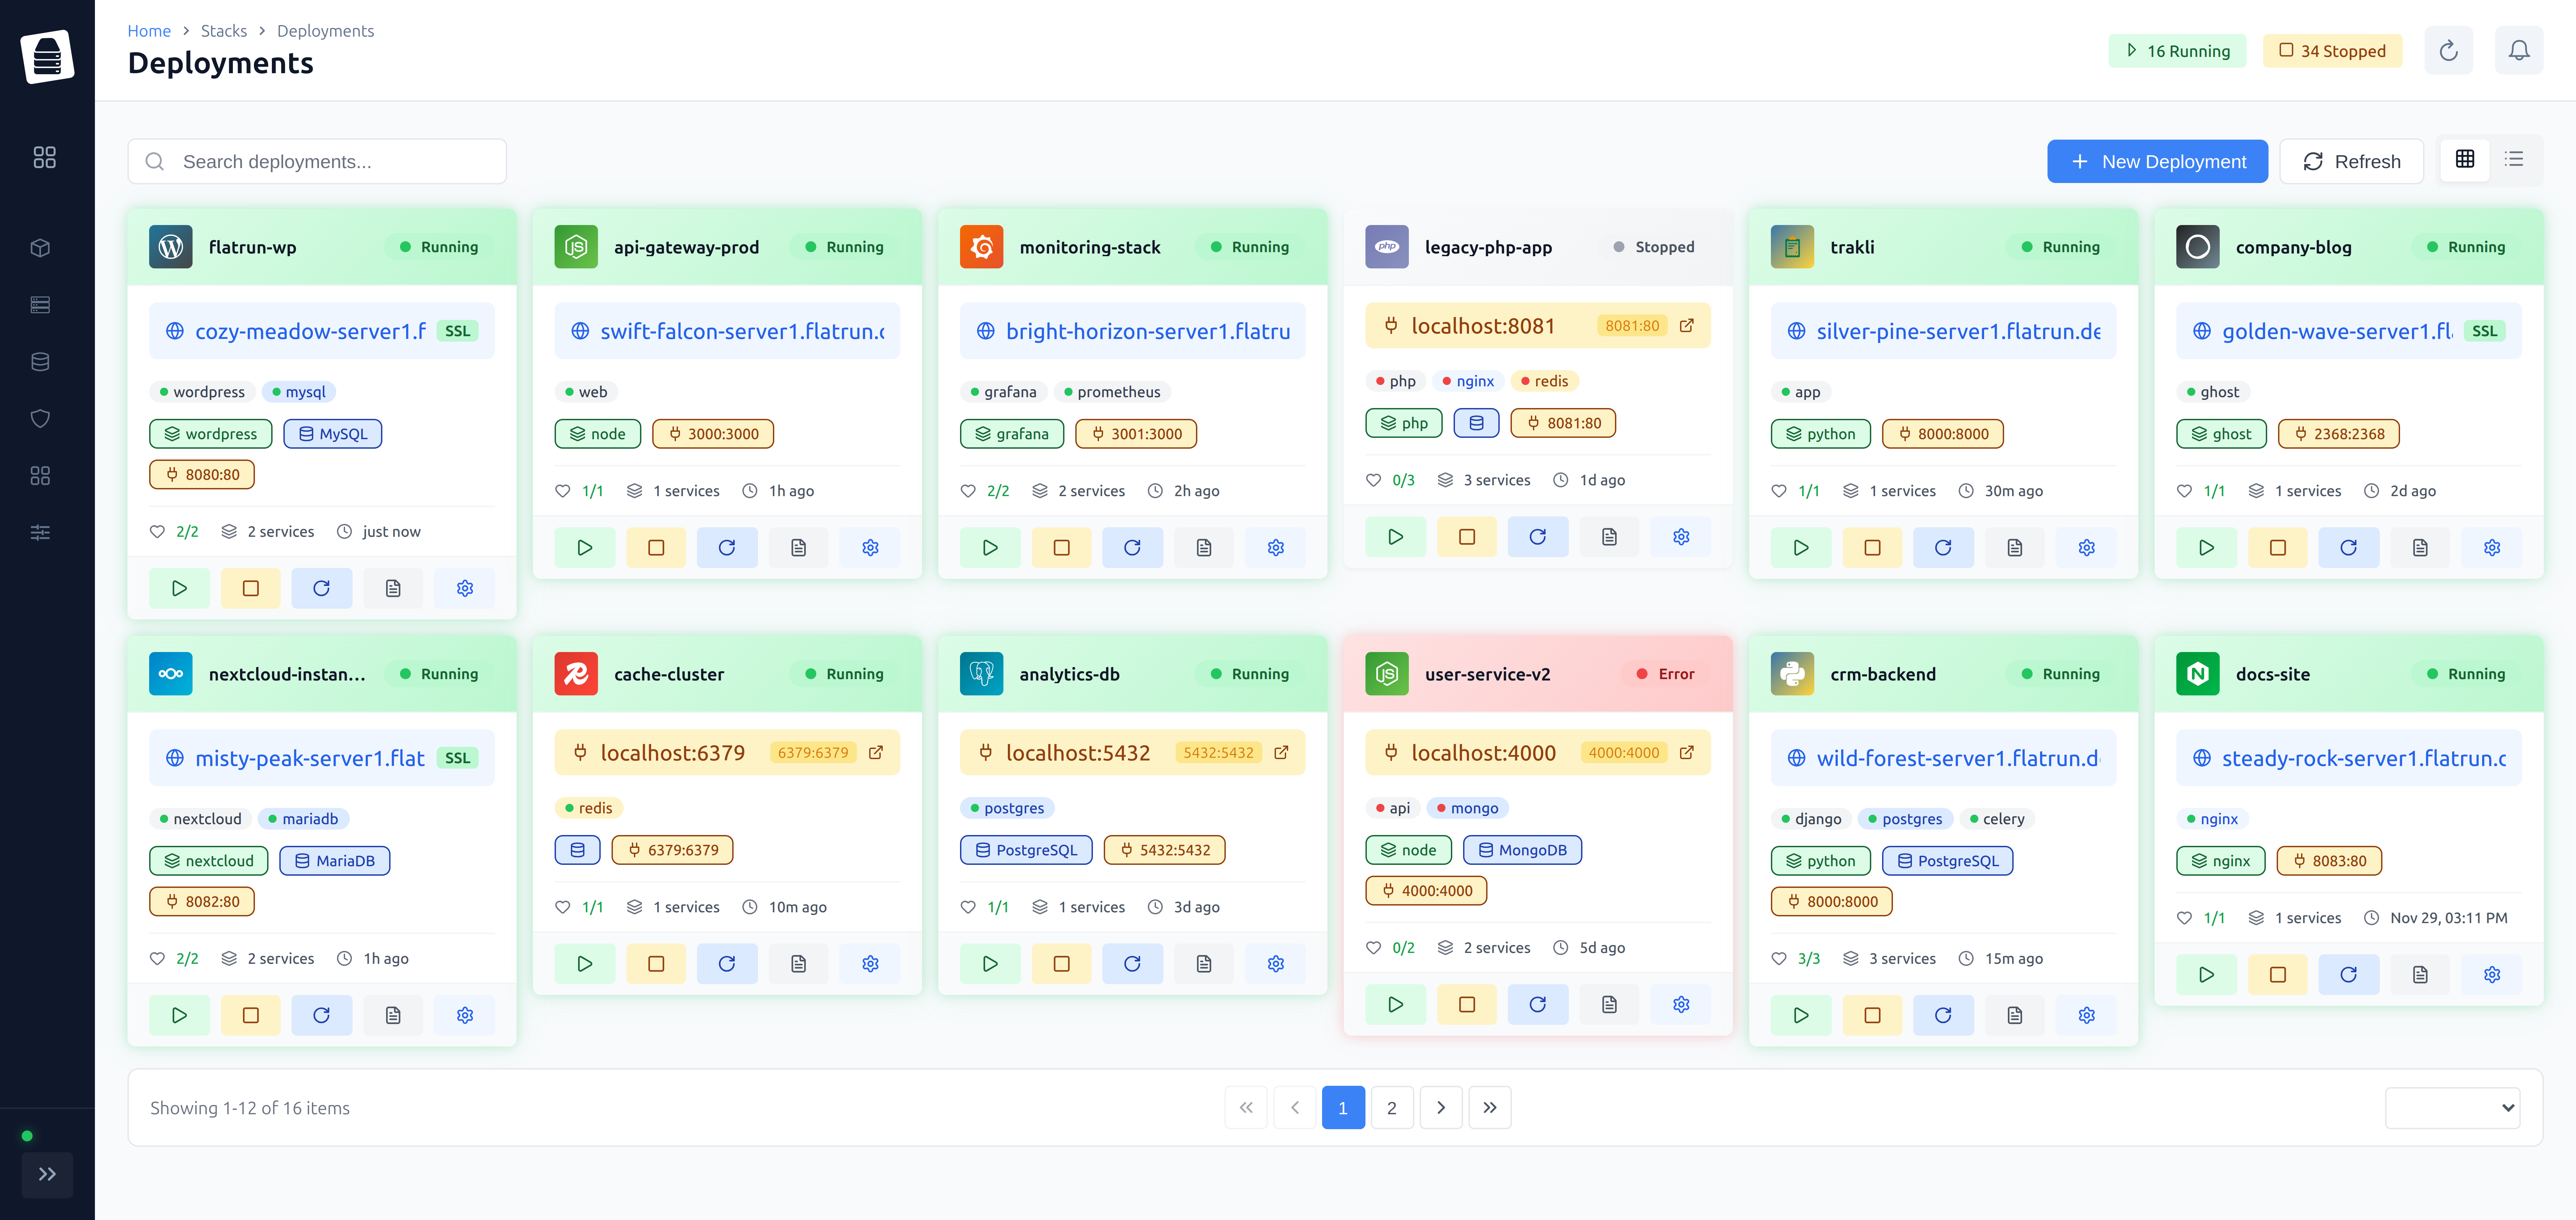
Deployments List
The deployments list shows all your applications with key information:
- Name — Deployment identifier
- Status — Running, stopped, error, etc.
- Services — Number of containers in the deployment
- Domain — Configured domain (if any)
- Created — When the deployment was created
- Actions — Quick action buttons
Filtering and Search
Use the search bar to filter deployments by name. You can also filter by status using the status dropdown.
View Modes
Toggle between:
- Table View — Compact list with sortable columns
- Grid View — Card-based layout with more details
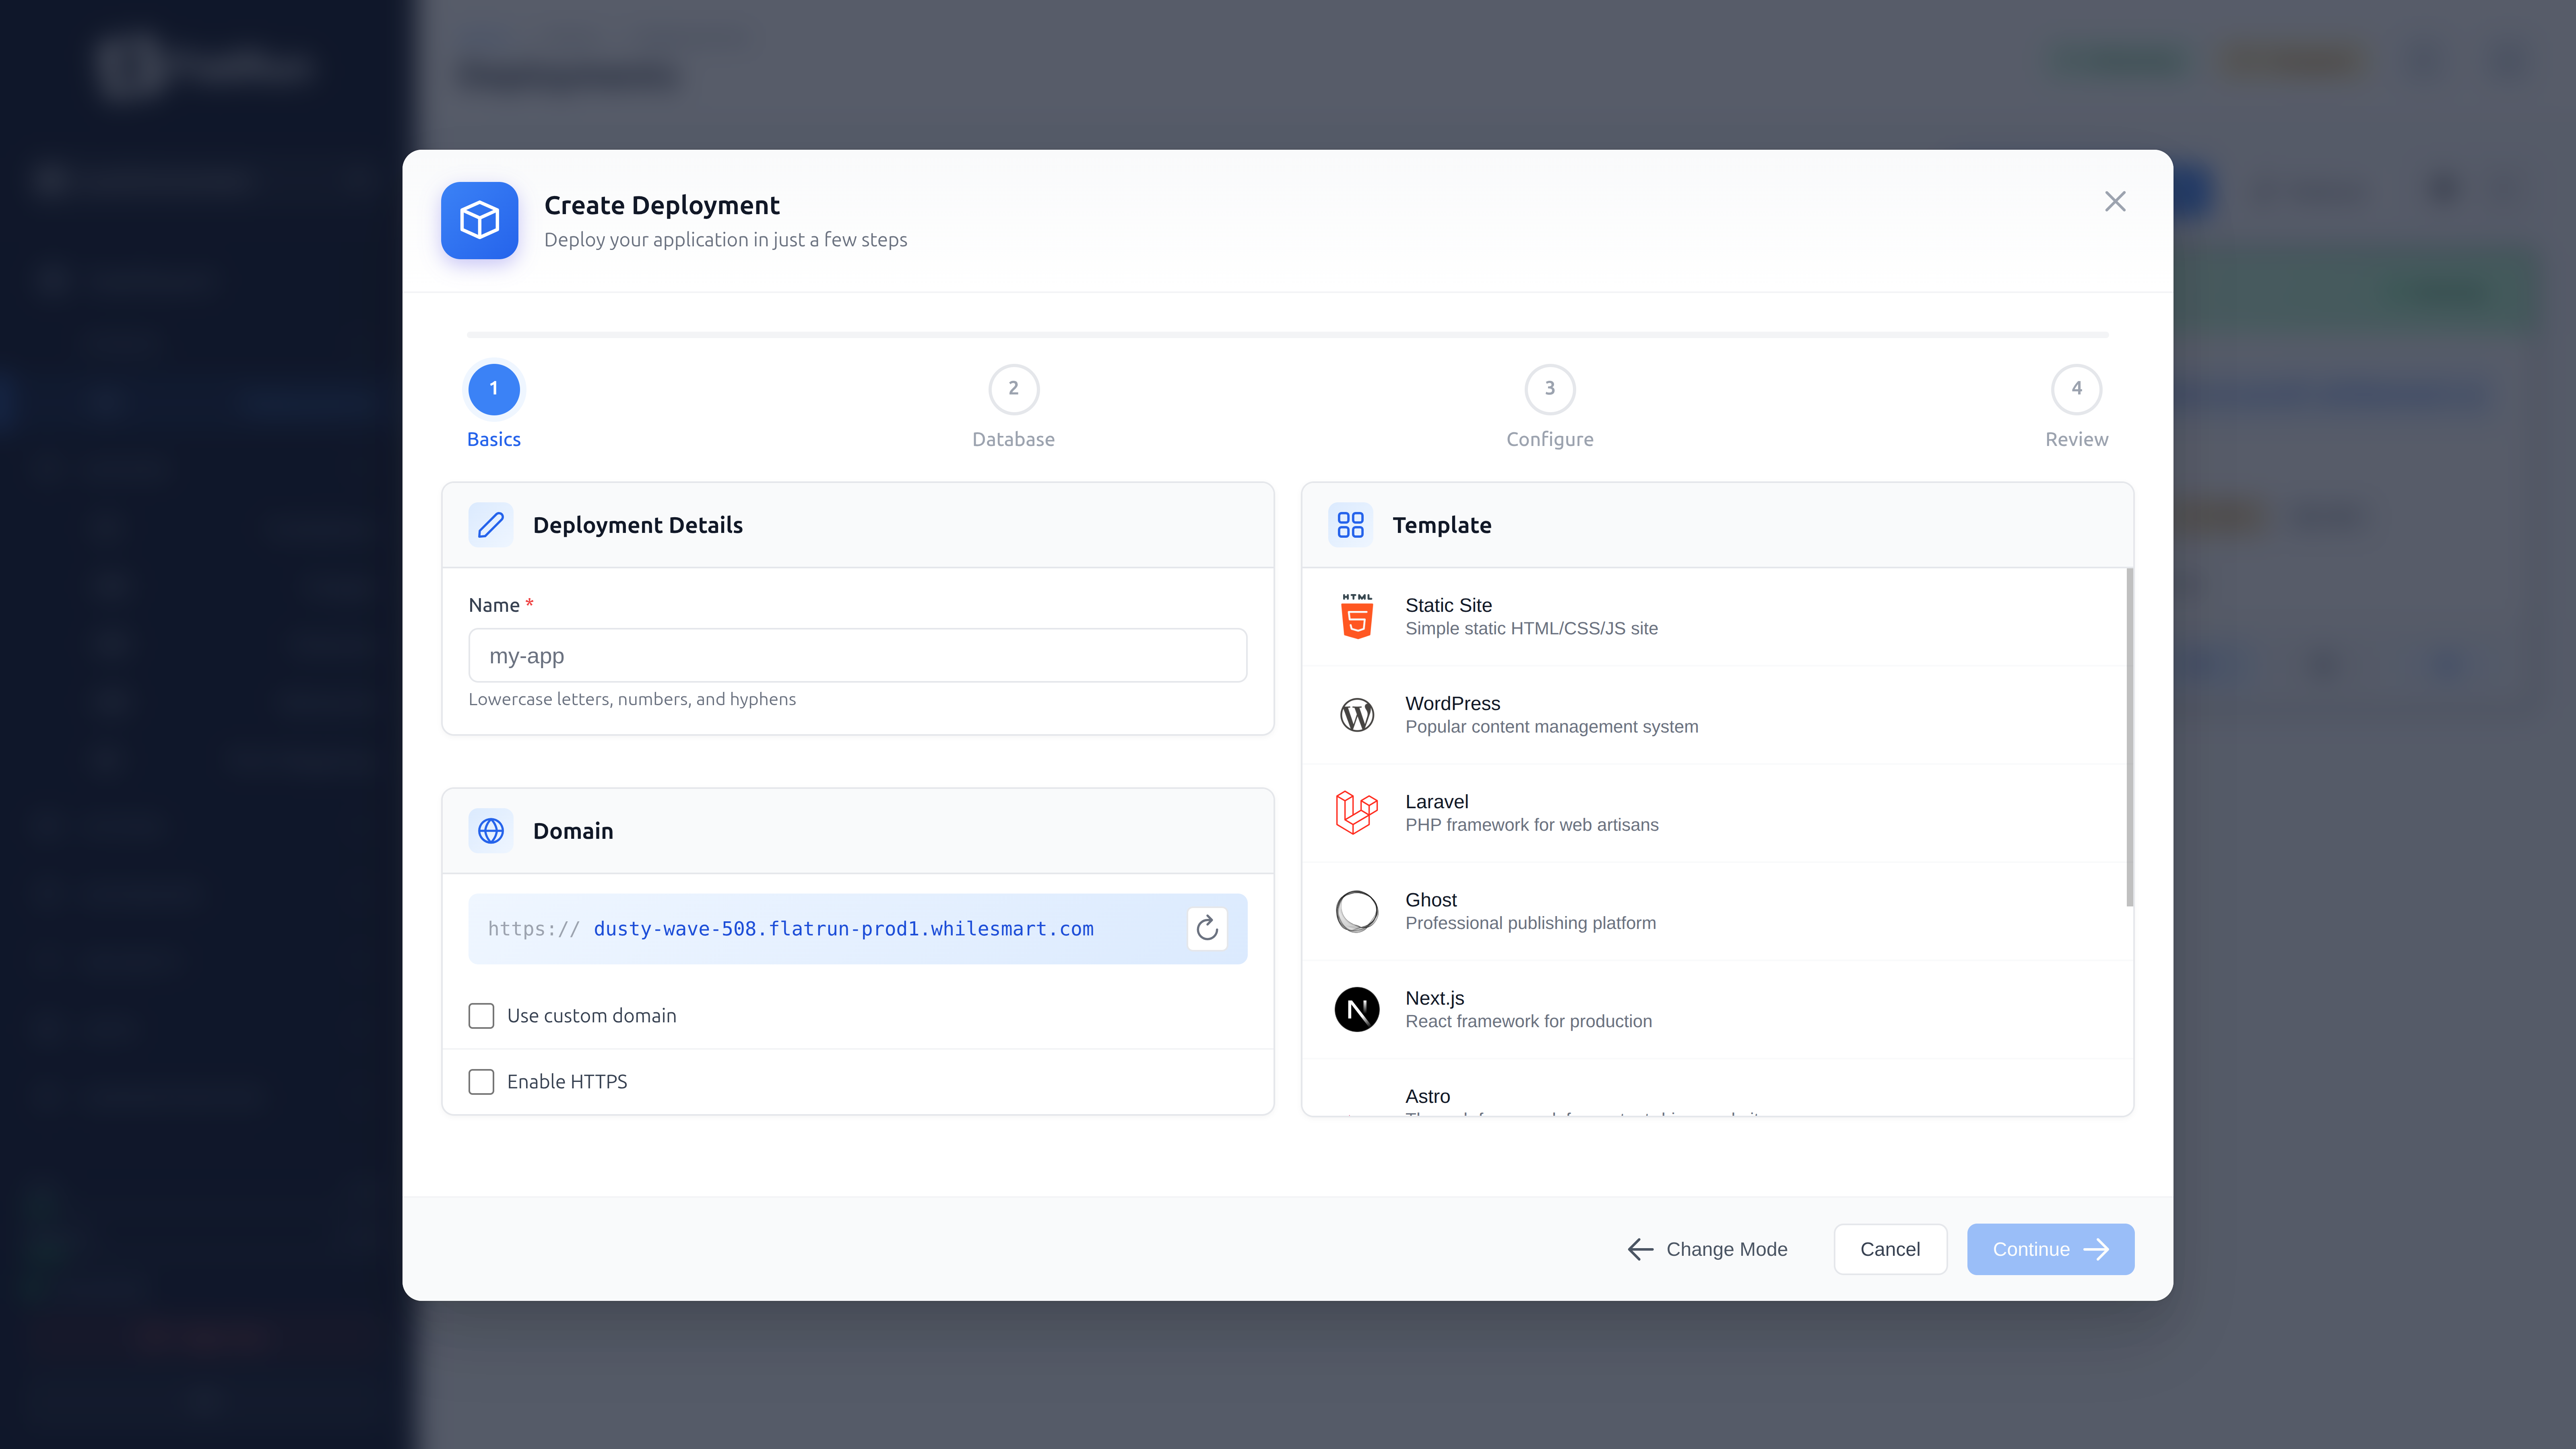
Creating Deployments
Click "New Deployment" to open the deployment wizard. Two modes are available:
Easy Mode
Deploy from pre-configured templates:
- Select a template category (Applications, Frameworks, etc.)
- Click on a template to select it
- Enter a deployment name
- Configure optional settings:
- Port — External port for the application
- Domain — Custom domain (if proxy is enabled)
- Mount Points — What data to persist
- Database — Use shared database (if applicable)
- Click "Deploy" to create and start the deployment
Compose Mode
For advanced users who want full control:
- Enter a deployment name
- Write or paste your
docker-compose.yml - Optionally add environment variables
- Click "Deploy"
Deployment Detail View
Click on a deployment to open its detail view. This provides comprehensive information and controls organized in tabs:
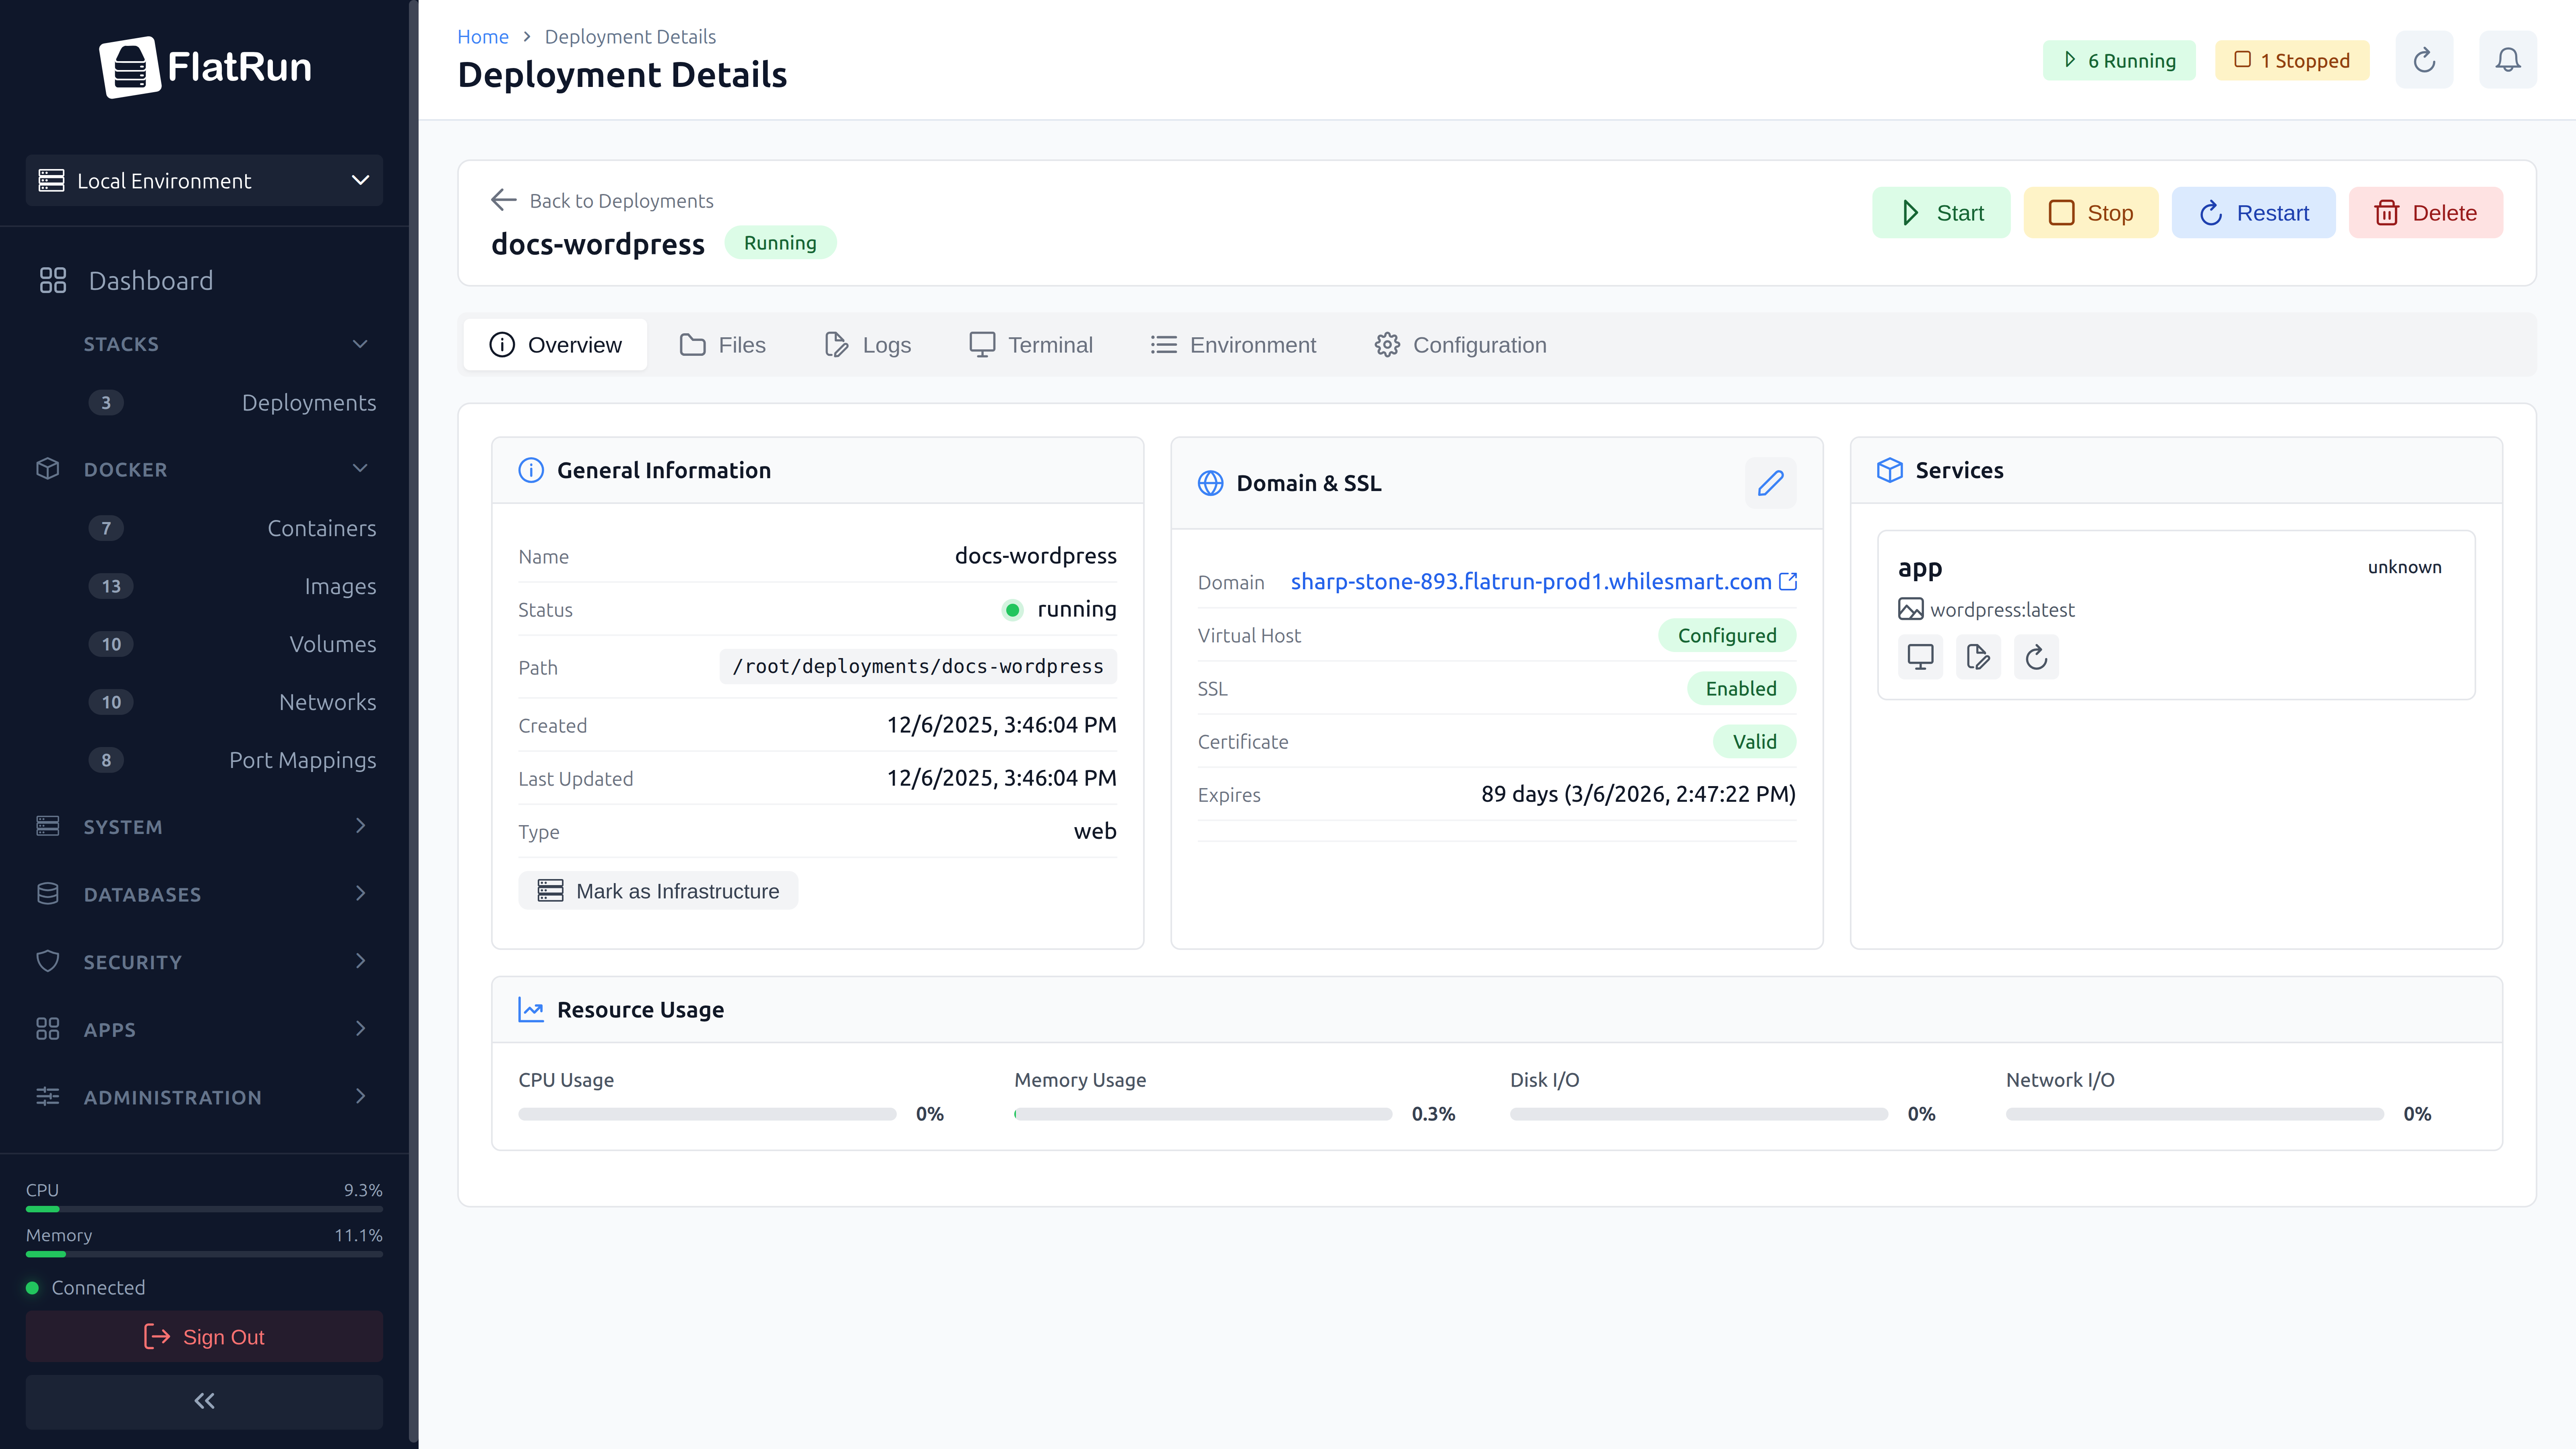
Overview Tab
- General Info — Name, status, creation date
- Domain & SSL — Proxy configuration, SSL status
- Lifecycle Controls — Start, stop, restart, delete buttons
Services Tab
Lists all containers in the deployment:
- Container name and image
- Status and health
- Port mappings
- Individual container actions (logs, restart, etc.)
Logs Tab
Real-time log viewer with features:
- Service Filter — View logs for specific service
- Auto-scroll — Automatically scroll to new logs
- Tail Lines — Number of historical lines to show
- Download — Export logs to file
Stats Tab
Real-time resource usage monitoring:
- CPU — Usage percentage per container
- Memory — Used/limit and percentage
- Network — Bytes in/out
- Block I/O — Disk read/write
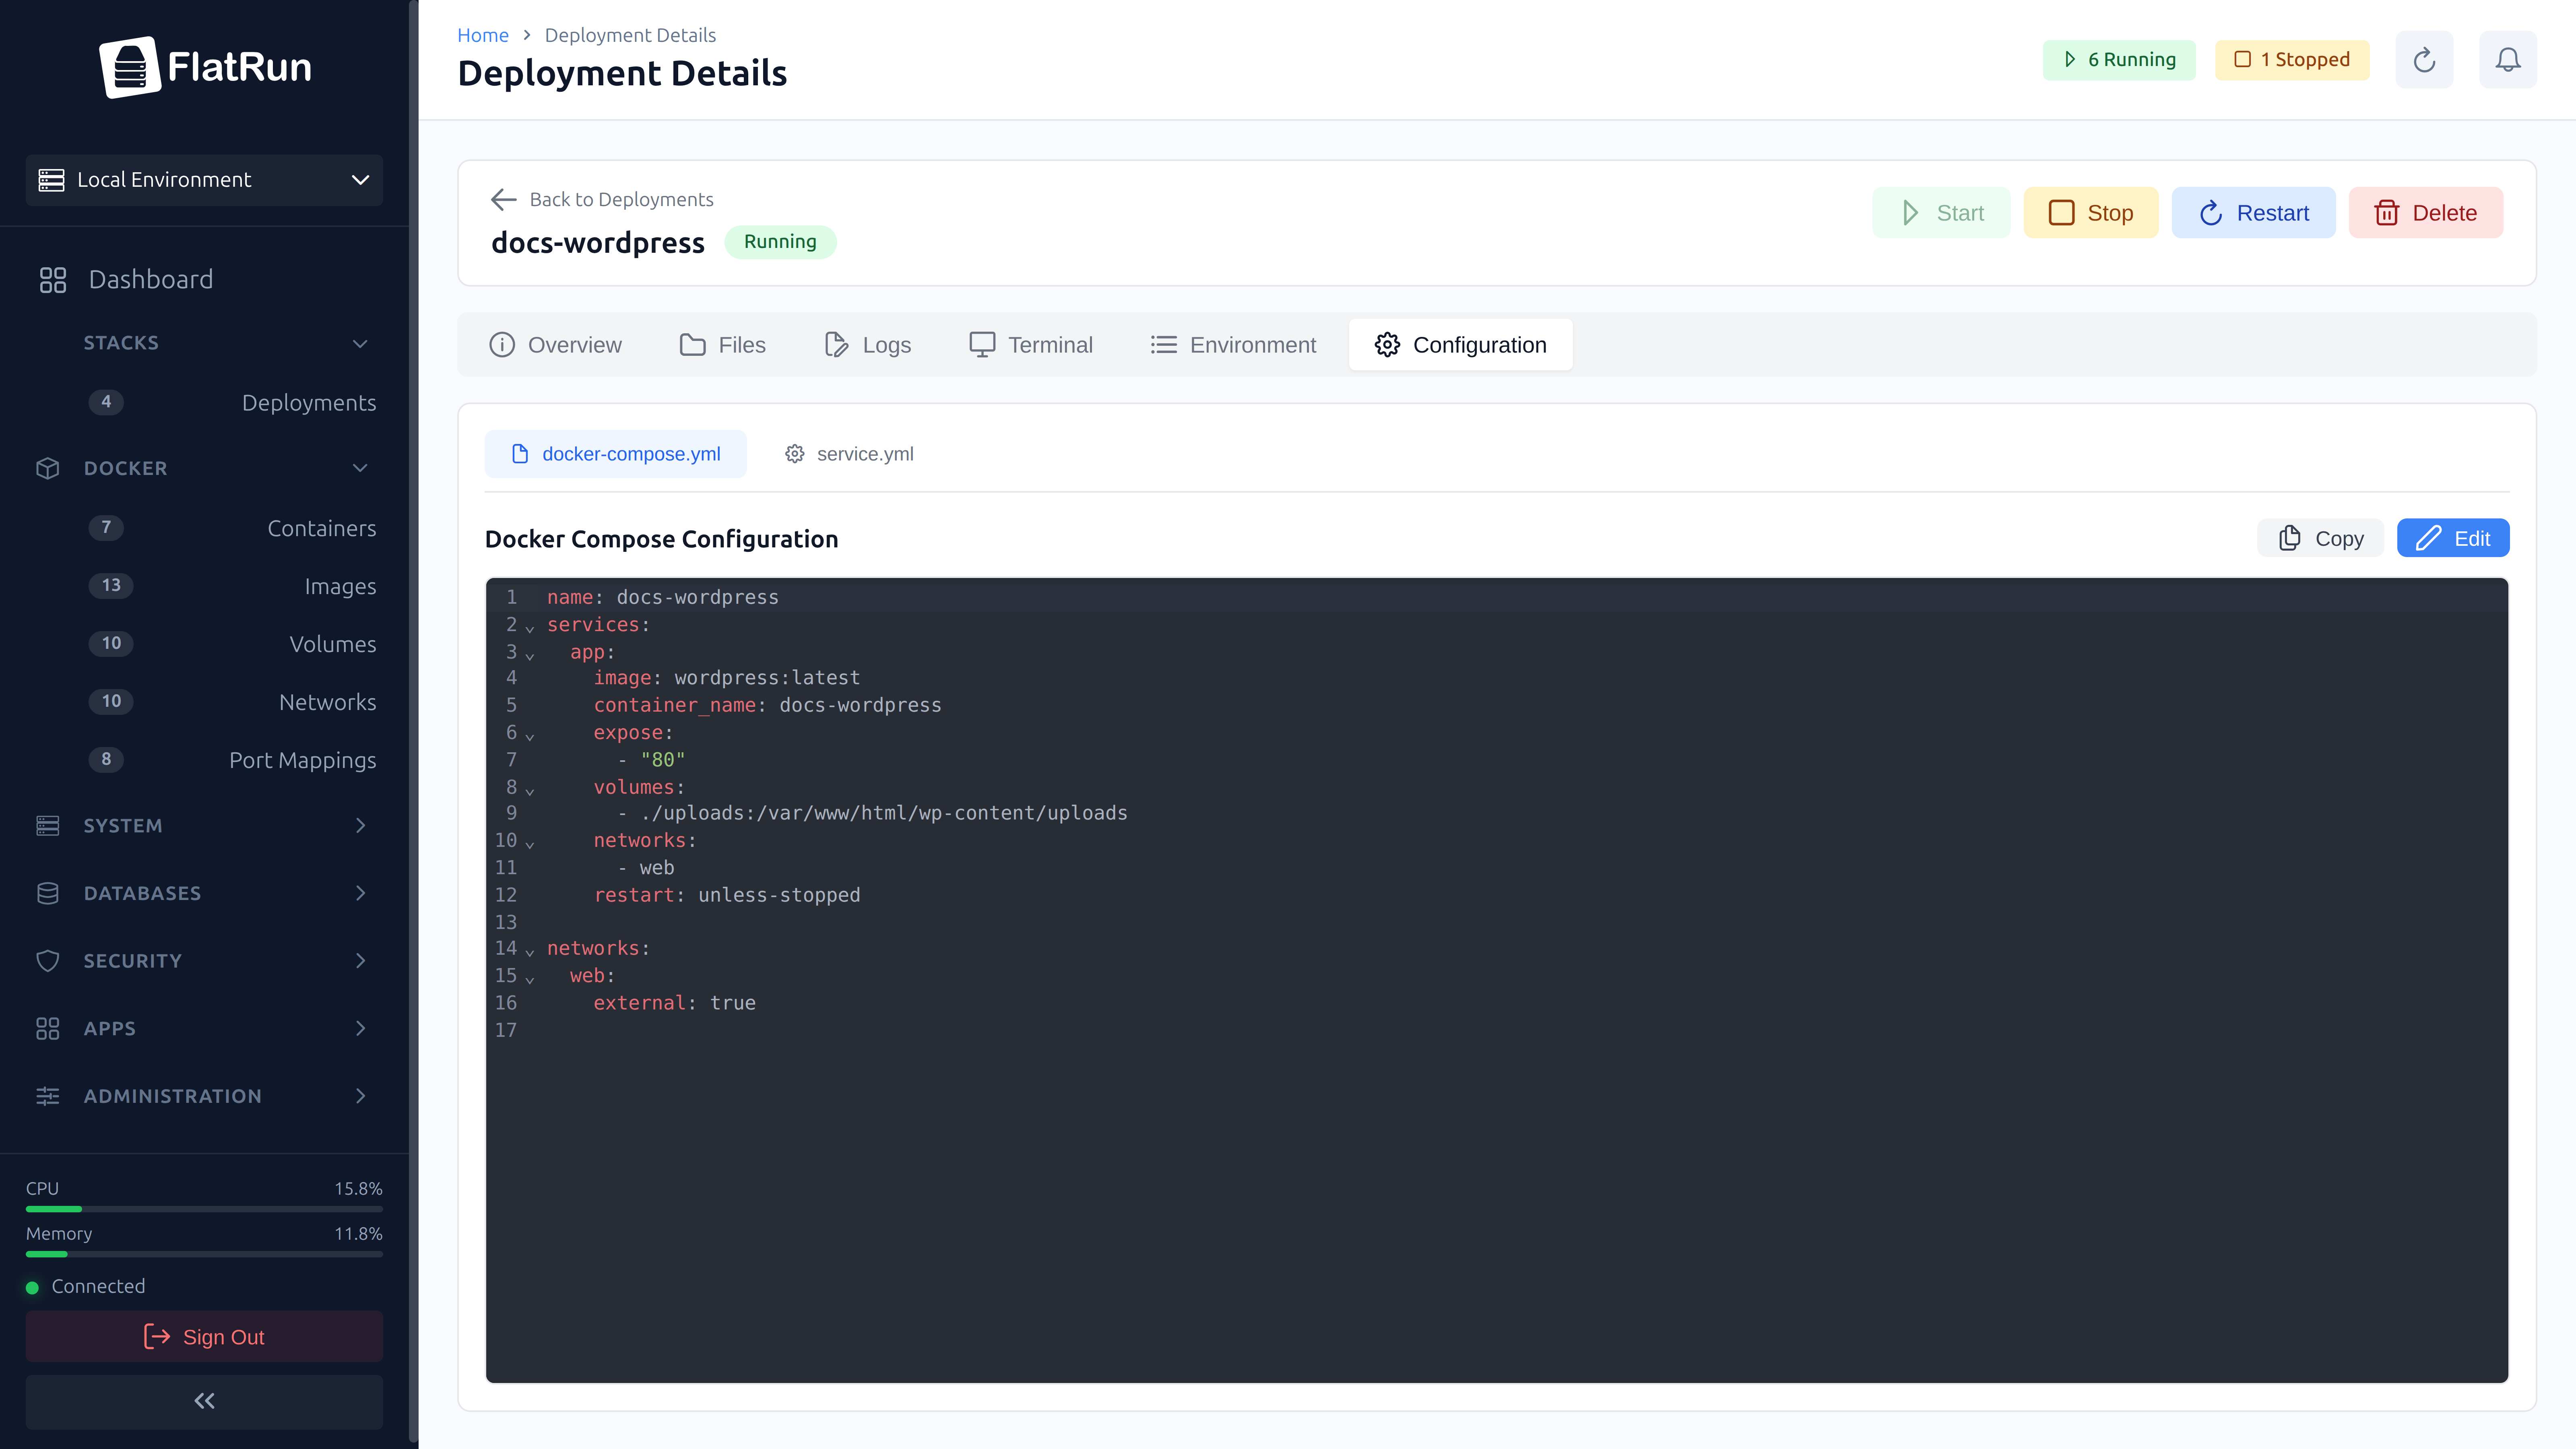
Compose Tab
View and edit the docker-compose.yml:
- Syntax-highlighted YAML editor
- Save changes and restart to apply
- View raw compose file
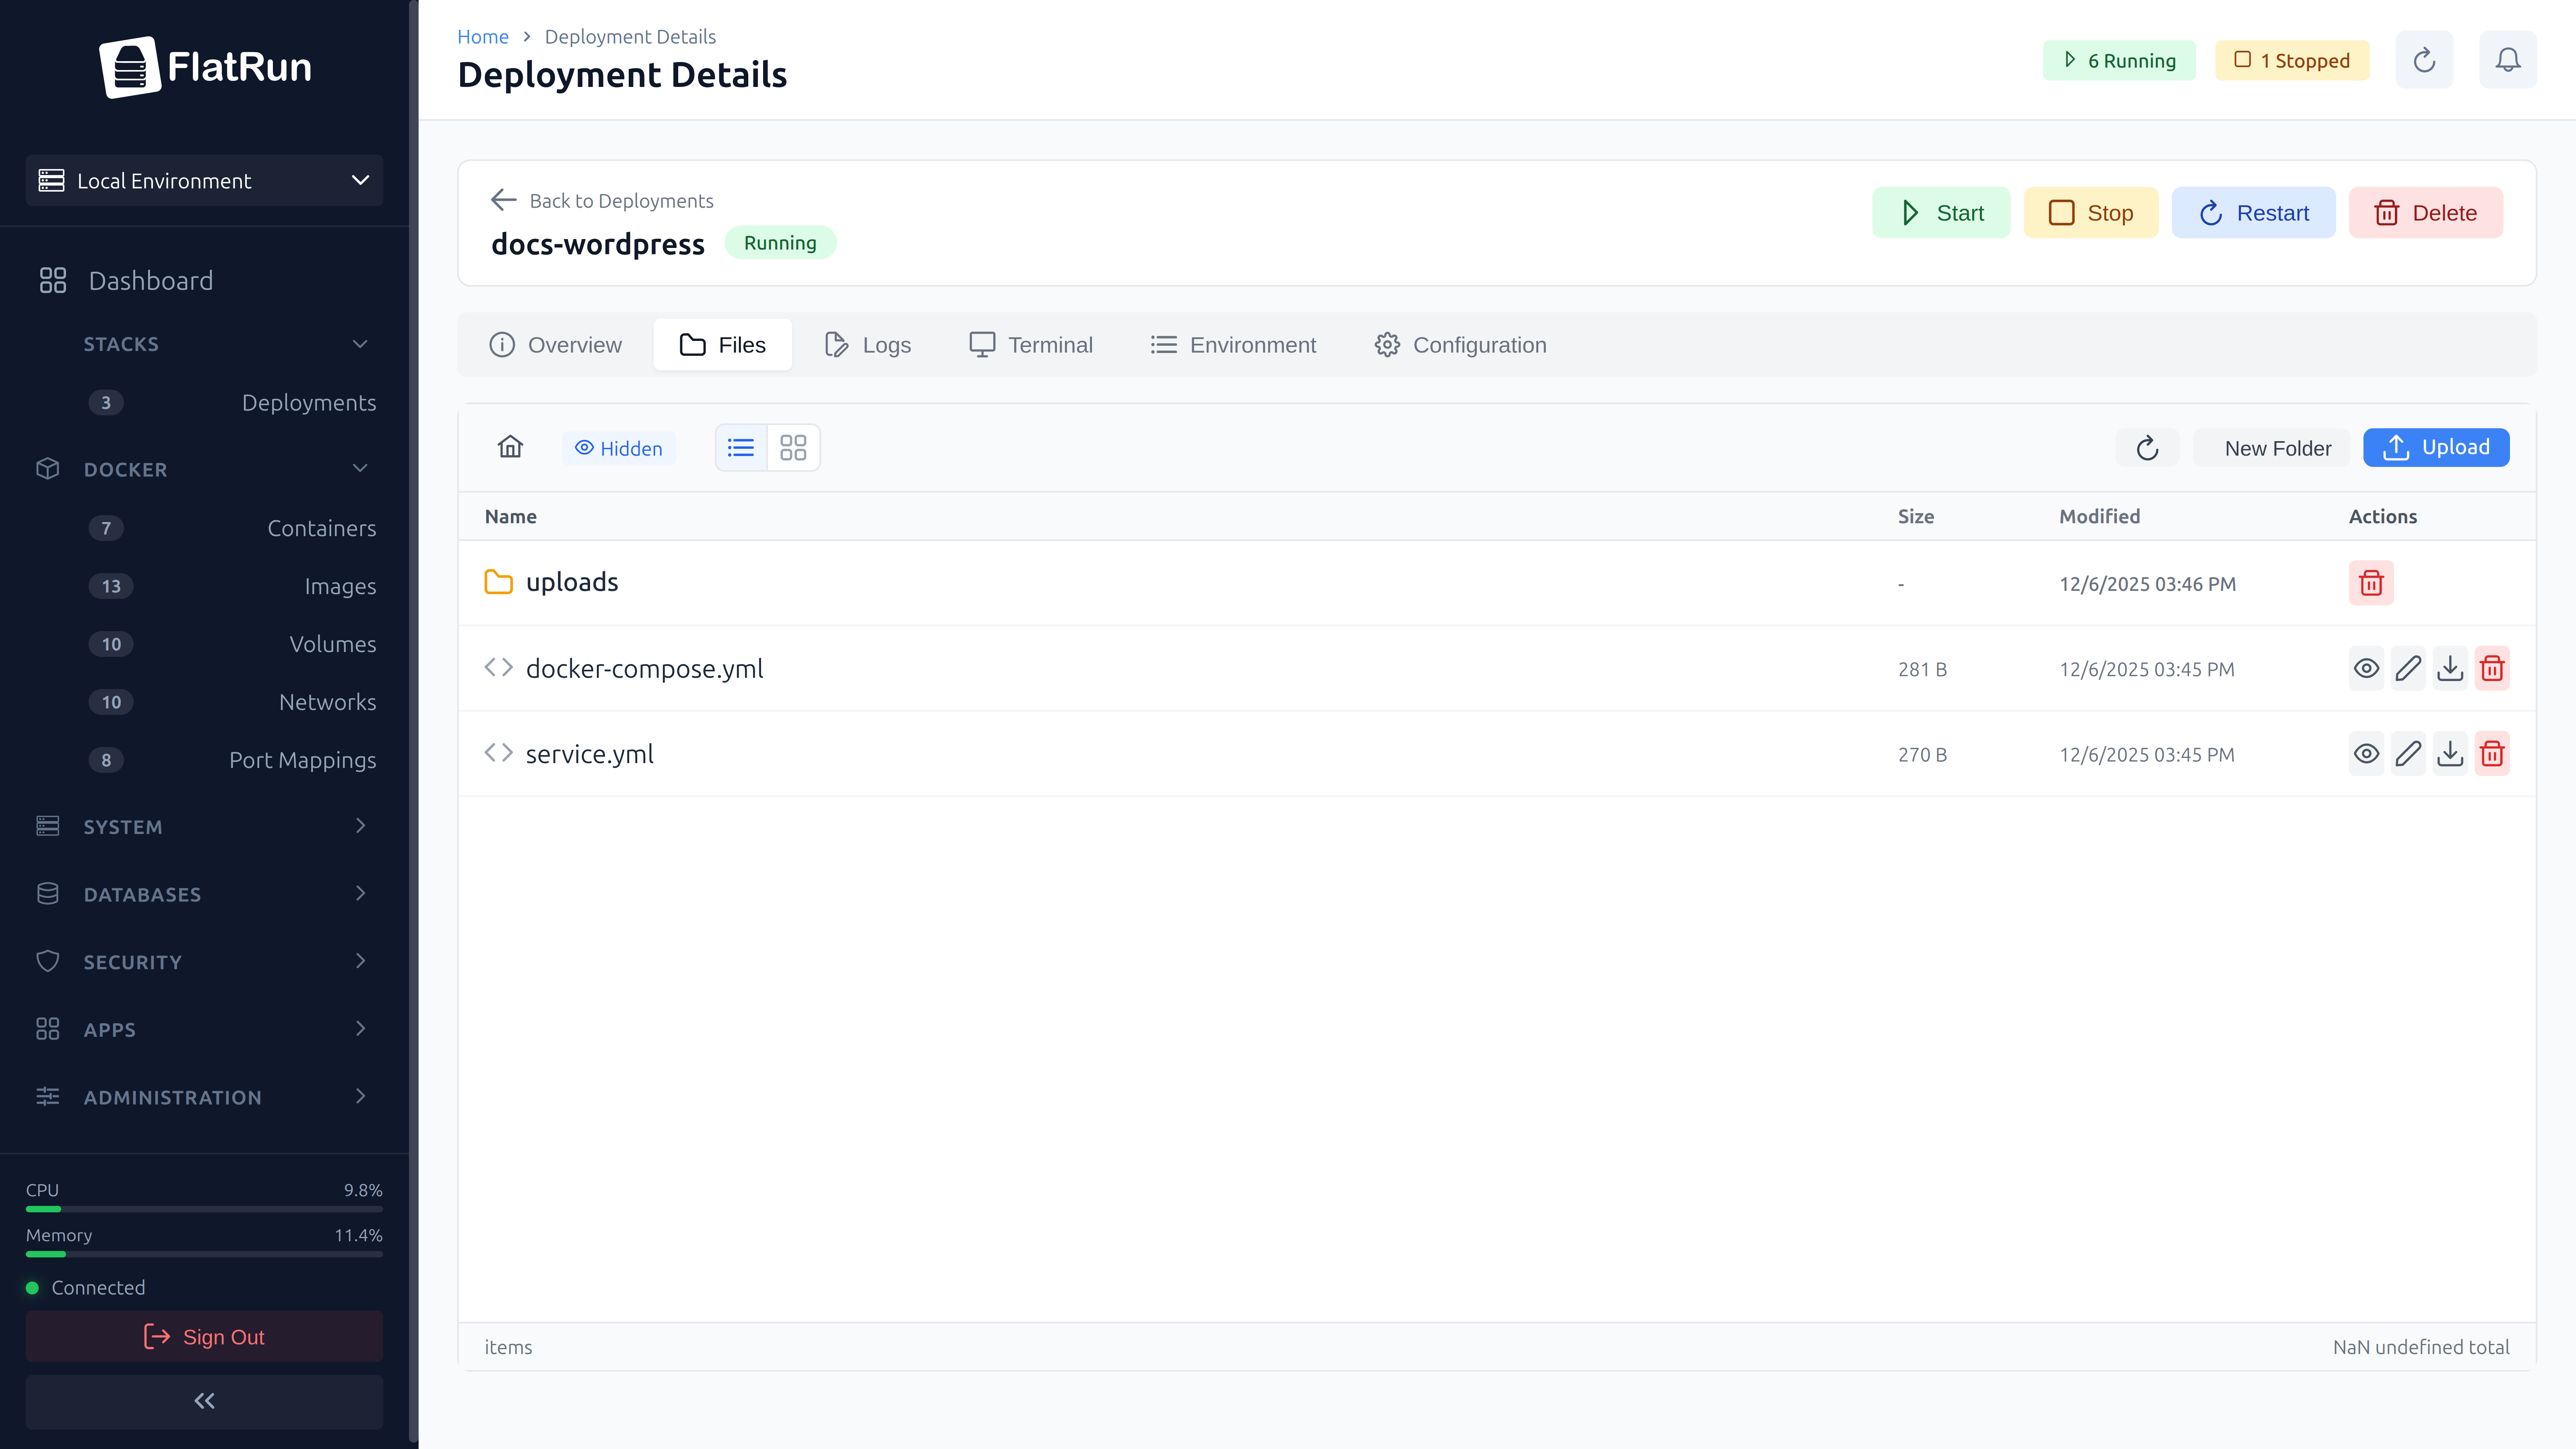
Files Tab
Browse and manage deployment files:
- File tree navigation
- View and edit text files
- Upload new files
- Download files
- Create directories
- Delete files (with confirmation)
Quick Actions Tab
Define and execute custom commands for your deployment:
- Create reusable command shortcuts
- Execute commands in any container
- View command output in real-time
- Edit or delete existing actions
Example quick actions:
php artisan cache:clear— Clear Laravel cachenpm run build— Rebuild frontend assetspython manage.py migrate— Run Django migrations
Deployment Actions
Start
Starts all containers in the deployment using docker-compose up -d.
Stop
Gracefully stops all containers using docker-compose down. Volumes and data are preserved.
Restart
Stops and starts all containers. Useful for applying configuration changes.
Delete
Removes the deployment:
- Stops all running containers
- Removes containers and networks
- Optionally deletes the deployment directory
Setting Up Proxy
To expose a deployment to the internet:
- Go to deployment detail → Overview tab
- Find the "Domain & SSL" section
- Click "Set Up Proxy"
- Enter your domain name
- Select the container port
- Enable SSL if desired
- Save
FlatRun will:
- Generate Nginx virtual host configuration
- Reload Nginx to apply changes
- Request SSL certificate if enabled
Multi-Domain Setup
A single deployment can serve multiple domains. This is useful for:
- Separating frontend and API on different domains
- Running multiple sites from one deployment
- Admin panels on separate subdomains
Adding Multiple Domains
- Go to deployment detail → Domains tab
- Click "Add Domain"
- Configure the domain:
- Domain — The domain name
- Service — Target container service
- Port — Container port
- Path — URL path prefix (optional)
- SSL — Enable HTTPS
- Aliases — Additional domains (e.g., www subdomain)
- Click "Add"
Each domain can point to a different service within the deployment.
Multi-Database Configuration
Deployments can connect to multiple databases of different types. Configure databases from the deployment settings.
Database Connection Modes
- Shared — Use the shared infrastructure database (MySQL/PostgreSQL)
- Container — Use a database container within this deployment
- External — Connect to an external database server
Adding Database Connections
- Go to deployment detail → Settings
- Find the "Databases" section
- Click "Add Database"
- Configure the connection:
- Alias — Friendly name (primary, analytics, etc.)
- Type — mysql, postgres, redis, mongodb
- Mode — shared, container, or external
- Connection Details — Host, port, database name
- Env Prefix — Prefix for environment variables
- Save
Environment variables are automatically generated based on the env_prefix:
${PREFIX}_HOST${PREFIX}_PORT${PREFIX}_DATABASE${PREFIX}_USERNAME${PREFIX}_PASSWORD
Updating Deployments
To update a deployment:
- Go to the Compose tab
- Make your changes to the docker-compose.yml
- Click "Save"
- Restart the deployment to apply changes
Bulk Operations
Select multiple deployments using checkboxes to perform bulk actions:
- Start All — Start all selected deployments
- Stop All — Stop all selected deployments
- Delete All — Delete all selected deployments (with confirmation)